Photographing in the Fog
When I agreed to a Florida extended family photo session, I pictured palm trees and bright sunshine. I was prepared to shoot early and strategically to avoid harsh shadows and haze from the morning sun. Joke’s on me though because we arrived at Rollins College to find the campus covered in a thick fog. My whole plan changed when I realized I’d be photographing in the fog and I started brainstorming ways to get the best images I could despite less than ideal conditions.
Tips for Photographing in the Fog
We started the morning on Mills Lawn, a wide open green space in front of the Mills Memorial Center. We did a few group shots here, but I quickly realized that I was going to have a hard time achieving my signature style at this location. The heavy fog muted the background colors and I needed something to better reflect the little light that we had.

I opted to move the group across the street to Knowles Memorial Chapel and am so glad I did. While I still would have loved some sunshine, the light-colored buildings and sidewalks were just the reflectors I needed. I was able to achieve much brighter images in this location. Plus we got some beautiful foreground with the bright pink flowers in the garden.
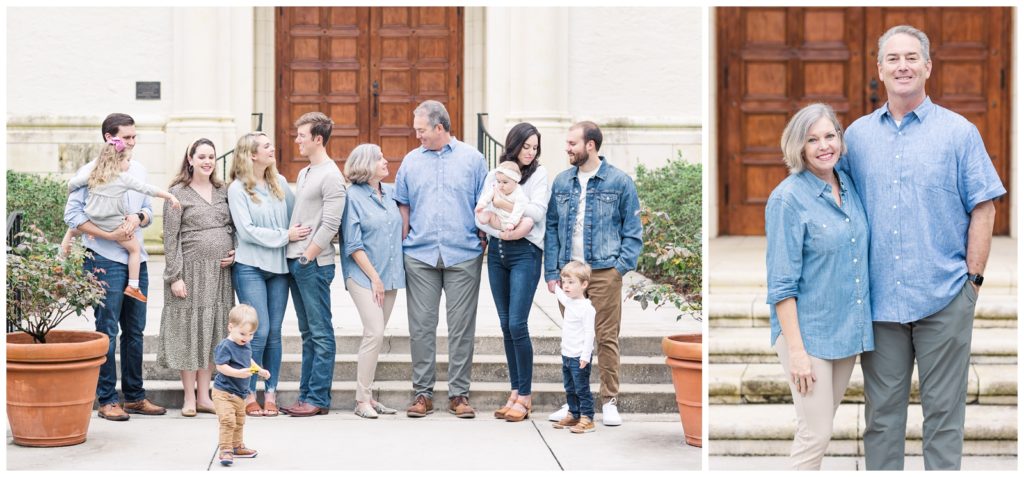
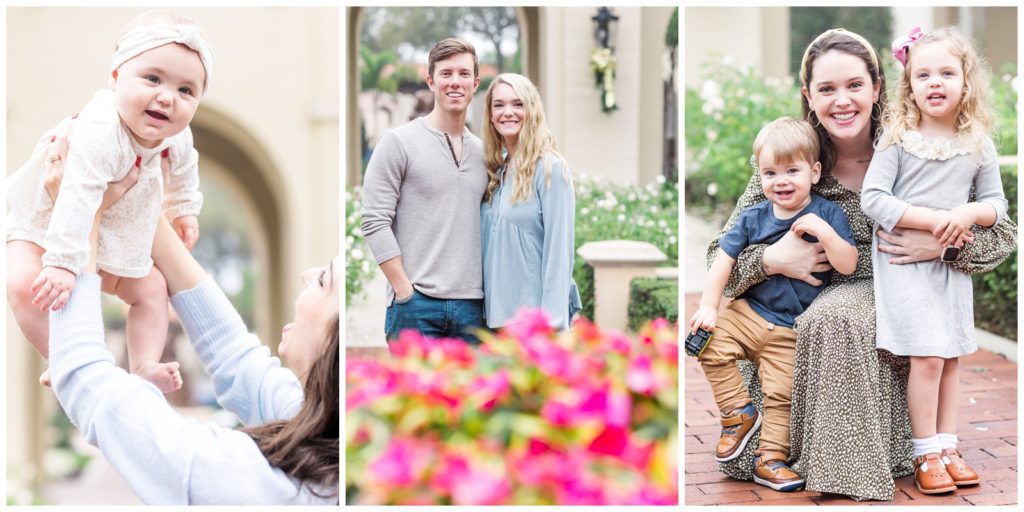
When shooting on a sunny day, I always face my subject’s back to the sun to avoid harsh shadows on their face. (More on that here!) On a cloudy/foggy day though, I do the opposite! Since the sun is being diffused by the clouds, turning the subject towards the sun allows the softer light to shine on their face and fill in any shadows. I see the biggest difference in the subject’s eyes when I do this. With their back to the sun, they typically have dark eye sockets, but turning them around allows the light to fill in their eyes. Here’s an example of the difference that it makes.
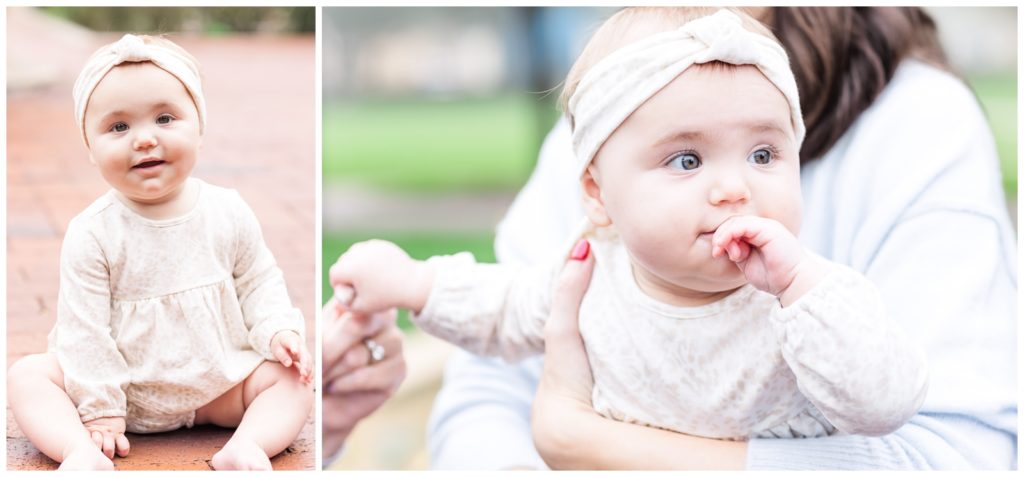
Don’t get me wrong, the picture on the left is still a cute one of baby James! But, notice the difference in the shadows on her face in the two pictures. The area around her eyes and mouth are darker in the left image when her back is to the sun. Turning her around allowed the diffused light to fill in those shadows.
Recap
When photographing in the fog or on any cloudy day, it’s a good idea to look for bright surfaces to reflect the limited light you have. This could be a light colored wall or sidewalk, a patch of snow if there is any, or even the side of a white car or truck. You’ll want to position yourself so that the light can bounce off the reflector and onto your subject’s face. This will make for brighter colors and more true-to-life skin tones, which can both be hard to achieve on a dreary day.
I hope this was helpful! If you have any questions, please don’t hesitate to comment below or reach out at erin@erinthompsonphoto.com. I’d love to chat with you!
If you enjoyed this post, you may also love:

YES PLEASE!
Getting ready for your next PCS? This resource is for you! Download the guide for five actionable ways to set yourself up for success at your next assignment.
5 Ways to PCS-Prep your photography business
Getting ready for a PCS?
Getting ready for a PCS?
free download!
I HAVE A LITTLE SOMETHING FOR YOU!
I've been navigating military life with my family since 2008. In that time, I went from a full-time classroom teacher to an online course designer to a photographer. Actually, I still teach a little math on the side because I just love it too much!
Through it all, I've discovered how passionate I am about connecting with military families. Whether it's taking photos at a retirement ceremony, coaching a fellow milspouse photographer, or just grabbing coffee with a new squadron friend, I love this community. And as a teacher at heart, I'm excited to use this space to share what I've learned about business and life with you.
I'M ERIN.